Do Not Sell My Information      Privacy

Sunday, October 29, 2023

Siri 2.0: Making a GPT voice assistant

Once, while dabbling with AI again, I thought to myself, "Why can't I talk to AI?".
Literally talk to it, not just type on a keyboard and see a response on the screen, I mean use my voice and hear the AI speak. Although it's a little weird, we already have AI's such as Siri or Alexa. And I found out that ChatGPT and other new AI models are a lot more advanced than voice assistants now. Siri's IQ is a measly 23.9 (src), about twice less than a 6 year old's intelligence. While ChatGPT is 155 (src) (nearly as smart as Einstein?).

Although these measurements may not be the most accurate (Intelligence is very hard to define and measure), it's definitely time for a new, updated virtual assistant. 

First, I needed to figure out how to do this and what tools to use. What I planned to do was merge voice to text, text to speech, and large language models. I decided to use Python for the job. Even though it's not the fastest and not the best for AI, it should be easy to implement as a prototype, and will be of adequate performance. Next, I chose HuggingChat as the LLM; it is built on LLaMA, and is free and very easy to use, see this post I made if you want to learn how to use it yourself. Next is the SpeechRecognition module, using Google Speech Recognition. It's a pretty simple module and the Google Speech Recognition works very well each time I've used it. Finally, is pyttsx3, a text to speech module, this will give HuggingChat its voice.
 
The first thing to do is to plug in the modules.

import pyttsx3 # Text to speech
from hugchat import hugchat
from hugchat.login import Login
import speech_recognition as sr

The only thing this will do is import the modules we will be using, so next we should implement some functionality.

Next is to set up the AI. We will need to sign in, save the cookies, and start a new chatbot conversation. If you don't already have a HuggingFace account, you can make one at https://huggingface.co/ (it is completely free)

sign = Login(email, password)
cookies = sign.login()
cookie_path_dir = "./cookies_snapshot"
sign.saveCookiesToDir(cookie_path_dir)
chatbot = hugchat.ChatBot(cookies=cookies.get_dict())
isd = chatbot.new_conversation()


Now let's get into the juicy part, detecting speech. We will set up the microphone and speech detection software, then listen for speech. The following code snippets should be in a while True loop, in order to continuously listen for speech and have the AI answer questions.

while True:
    r = sr.Recognizer()
    with sr.Microphone() as source:
        print("Say something!")
        # Listen for speech
        audio = r.listen(source) 

Next, we will process the speech into text using recognize_google. Then, the following lines will query the chatbot and use the pyttsx3 text to speech to translate the chatbot's words into sound.

    try:
        print("(Detected) You said: " + r.recognize_google(audio))
        pyttsx3.speak("Got it. Let me think for a second.")
        # Query chatbot
        i = chatbot.query(r.recognize_google(audio))
        print(i)
        pyttsx3.speak(i)


Finally, we must decide what will happen in the event of an error. Usually this will happen when the Speech Recognition can't process the speech or if no words are spoken. A simple message via text to speech and the console will do.

    except sr.UnknownValueError:
        # If there are errors with Speech Recog.
        pyttsx3.speak("Sorry, I couldn't understand you. Do you mind saying that again?")
        print("Google Speech Recognition could not understand audio / No words were spoken")
    except sr.RequestError as e:
        pyttsx3.speak("Sorry, I couldn't understand you. Do you mind saying that again?")
        print("Could not request results from Google Speech Recognition service; {0}".format(e))


We are now done! Surprisingly, this program only takes 34 lines of code. It's truly incredible how easy it is to make complex programs like this.

Now, run the program, turn up your volume, and talk into your microphone. You are now talking to AI!

Full code:

import pyttsx3 # Text to speech
from hugchat import hugchat
from hugchat.login import Login
# Set up the ChatBot
sign = Login(email, password)
cookies = sign.login()
cookie_path_dir = "./cookies_snapshot"
sign.saveCookiesToDir(cookie_path_dir)
chatbot = hugchat.ChatBot(cookies=cookies.get_dict())
isd = chatbot.new_conversation()
#
import speech_recognition as sr
pyttsx3.speak("Alright, I'm ready for your questions.")
while True:
    r = sr.Recognizer()
    with sr.Microphone() as source:
        print("Say something!")
        # Listen for speech
        audio = r.listen(source)

    try:
        print("(Detected) You said: " + r.recognize_google(audio))
        pyttsx3.speak("Got it. Let me think for a second.")
        # Query chatbot
        i = chatbot.query(r.recognize_google(audio))
        print(i)
        pyttsx3.speak(i)
    except sr.UnknownValueError:
        # If there are errors with Speech Recog.
        pyttsx3.speak("Sorry, I couldn't understand you. Do you mind saying that again?")
        print("Google Speech Recognition could not understand audio / No words were spoken")
    except sr.RequestError as e:
        pyttsx3.speak("Sorry, I couldn't understand you. Do you mind saying that again?")
        print("Could not request results from Google Speech Recognition service; {0}".format(e))


Tuesday, August 1, 2023

This Scratch secret will make your project 10x faster

 Scratch is a neat program for creating games, animations, and more, but there is always one trade off - 

It's too slow!

Although Scratch is great, being capped off at 30 FPS is pretty limiting... 

But what if I told you there is a way to multiply your project speed 1000x? You do not have to use anything crazy like Turbo-Warp or Turbo-Mode or weird hacked blocks either.

Steps

First, go to the My Blocks area. 
You should be able to find it on the sidebar of the editor.

Then, click Make a Block. You can design the block however you want, the important part is clicking the "Run without screen refresh" button.
This will ensure that the project the block will run as fast as possible.

Now under the Define hat, place the code that you want to run faster.


Now once you use this block, rather than running at 30 FPS, the code under it will run as fast as the computer and browser will allow it. You can easily see how must faster it will run. I made an example, circle drawing program. With the Run without screen refresh block, the circles are drawn as soon as you click the green flag. But without it, you can see that it takes much longer.
With
Without

You can end up doing a lot of things with this, including:
  • Fast image scanning
  • Advanced graphics
  • Extremely fast algorithms and calculations
  • Intensive projects
I'm currently working on a lot of cool stuff with this (Like AI algorithms!)

So hopefully this will help you too, if you decide to get into advanced stuff, as I don't see very many people talking about this.

Tuesday, June 13, 2023

Experimenting with free AI APIs (Python)

 If you've been around the internet recently, you've probably heard about the boom in artificial intelligence and chatbots.

And that's why I got to jump on the bandwagon as well

But as a programming enthusiast, I've always wondered how exactly AI algorithms work, and especially how AI can learn to create art, finish my math homework and even write code!
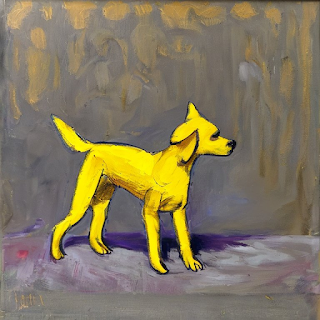
Created by the "Stable Diffusion" AI
It turns out there is LOTS of stuff going on under the hood. There are dozens of algorithms and systems, some just basic machine learning, others entire neural networks to simulate brains. Luckily though, there are many libraries and APIs that can help you out with the more complex stuff.

My first attempts

When I was first starting with AI, I decided to choose JavaScript as my language, mostly because I was most comfortable with it and knew quite a bit already. I went with the BrainJS library. It's quite simple to use and you do not have to have much knowledge of neural networks to use it. I wanted to create generative AI at first, so I started writing LOTS of training data for the AI model. Training data is a must for many AIs. A new AI has no information about anything, so what we need to do is feed it training data. Say you want to create a story telling AI, before the AI understands how to write stories you will have to give it lots of story examples, in order to give it "ideas". In BrainJS, we can do this by giving it lots of data in JSON like format. 

I ended up creating several projects with this library, but I soon realized that it was going to take a lot of time and effort to make generative AI as advanced as I'd like. Along with that, it was going to take a lot of computing power to train large models, something my little laptop would not be strong at. In addition, I found that JavaScript is not the ideal language to develop AI in practically.
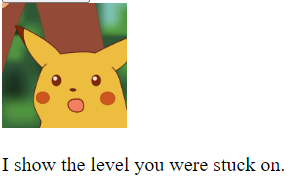
My AI meme maker (JS)
Luckily though, many APIs were becoming available and I decided to give some a try.

AI with ChatBot APIs

APIs are a good option, you don't have to code the entire AI, by borrowing code from other AI services, while still being able to customize it to your needs. Think of APIs like ordering something off Amazon, you order the item you'd like and they will deliver it to you, but in this case we are ordering AI chatbots.
It was a daunting task to find the API I wanted, but I decided to go with this one called HuggingChat, a chatbot, similar to ones you may have heard of like, ChatGPT and Bard. It is free, open source and has a Python API. 
In order to use the API you must use the Python Module associated with it:

pip install hugchat

Setting up the module is pretty simple, first import the necessary packages:

from hugchat import hugchat
from hugchat.login import Login

 In order to use the API, you need a HuggingFace account. You can make one for free at their website, https://huggingface.co/

You will need this account, because you will have to insert your account details into your code in order for it to work:

sign = Login("Put your email in here", "and your password here")

cookies = sign.login()

sign.saveCookies()

Finally, setup the chatbot by using this code snippet:

chatbot = hugchat.ChatBot(cookies=cookies.get_dict())

Now it should be working, to test it try something like this:

print(chatbot.chat("Hello"))

Now, if the code and API is working correctly, you'll get a response in your shell that looks like this:

Hello! I am your AI Assistant, ready to assist you. How can I help?

Pretty interesting! Now that you've got the base code ready, you might want to add some other things.

For my first project I decided to make a bot that is a little funny. I ended up using this prompt for it:

Answer this question, except this time, provide an incorrect, funny, sarcastic answer. Here is the question: 

As you can see I got some funny responses 😆


This may look daunting, but it's actually just the prompt- and a few lines of code:

messages = input()

print(chatbot.chat("Answer this question, except this time, provide an incorrect, funny, sarcastic answer. Here is the question: " + messages))

Plus you can use chatbot.chat anywhere, so you can do even more things than just make chatbots. For example, I've been working on an AI app that can help you edit documents and more. It connects to your text document and then uses chatbot.chat to give suggestions. (Maybe I'll release it soon 😉)

Hopefully you found this as interesting as I did and I'd love to see what you create!

Also- You may want to check out the full documentation on the Python API - https://github.com/Soulter/hugging-chat-api

There are more options and settings there that I did not cover. I'd like to thank the people that made this API as it is extremely helpful and I'm glad to see more free options coming.


Sunday, April 25, 2021

How to Embed Scratch Projects to Your Websites

 Scratch projects are awesome, but sometimes you want to share the goodness outside of the scratch website, or make a website to show off all your projects. In this post I'll be showing you just how to do that.

For the first step all you have to do is find a project you like, and then in the bottom right there should be a button that says Copy Link.

Then you'll find a link and embed code.


You'll want to copy that so you can use it on your page. After that, you can go to whatever text editor or website builder you use and paste in that line of code. It should look something like this:

<iframe src="https://scratch.mit.edu/projects/your-projectID/embed" allowtransparency="true" width="485" height="402" frameborder="0" scrolling="no" allowfullscreen></iframe>

Now you can save it and the project will show up on your page!

If you haven't used html like this before, what it does is uses the <iframe> tag. That will tell html to pull some data from Scratch and display it on your page. You can use the same html tag for almost any website, as long as it allows embedding. Try this code out on another website that you like to go to:

<iframe src="https://yoururlhere/"></iframe>

If that didn't work, it might mean that the website does not allow embeds. Test it out on multiple websites if it doesn't work the first time.
You can also experiment with the code to make cool stuff! Lets go back to our code from Scratch.
 
<iframe src="https://scratch.mit.edu/projects/your-projectID/embed" allowtransparency="true" width="485" height="402" frameborder="0" scrolling="no" allowfullscreen></iframe>

You can edit any of this code except for

<iframe src= and </iframe>

or it will stop working.

I'll try changing the width and height,

As you can see it will change the height and width of the iframe.

Just don't set the values that high or you'll break your site like I did 😬
Well that's how to use iframes and embed your Scratch projects in just a few easy steps.
If your interested in html here's some good sources you can use to learn.
https://www.codecademy.com/learn/learn-html

https://www.w3schools.com/


If this helped, be sure to share this with your friends and stay tuned for future tutorials.

Friday, March 26, 2021

Experimenting With Scratch API’s

I’ve been recently looking into the Scratch API and it looks pretty interesting, especially since I haven’t done much with API before.

So I decided to work on this cool profile stats viewer for Scratch and it looks pretty cool so far.


Demo

Right now it just uses GET https://api.scratch.mit.edu/users/mryellowdoggy


I basically called the API in PHP and displayed it on the page (it wasn’t super complicated).

I plan to add more though since its kind of useless currently because you can just find someone’s profile from the Scratch website using Better Search For Scratch and find the info through there.

Once I add some more stuff I’ll definitely post it on my projects page and put some documentation.

If you’re interested in using the API I do recommend checking out the Scratch Wiki article for it or the Unofficial Docs.

Tuesday, March 23, 2021

How to use Scratch CDN2 for Image Hosting

On the Scratch Forums you usually need a URL for your image to be hosted on. Many of the whitelisted image hosts cost money and require you to sign up for third party sites. Well, what if I told you that Scratch has a built-in image host? Yup, you can pretty easily use their CDN2 for image hosting on the forums.

The first thing you have to do is make a new project.

After that you should be able to upload an image as a backdrop.


From there you should be able to resize your image and edit it as you like.
Now we’re almost done!

Now go back into My Stuff and find the project you just made. Then you should be able to right click it and then press ‘Copy image address’.


The project editor was giving me trouble so I used one of my old animations for it.

Now, you should be able to go to the forums and put [img] BBcode tags around your URL.

Voila! There’s your image,


There’s also other tricks you can do with this. I recommend using Scratch Addons. If you have the Forum Image Uploader enabled on it, you’ll be able to click a button and upload it straight from your computer.


It uses a similar technique, all automated so you can get the image fast.

Well, there you go, now you know how to upload images using Scratch CDN2, all in only around 4 steps.

Thursday, January 28, 2021

Better Search For Scratch

 I recently thought of an new idea. My idea was to create a better search system for Scratch. Currently on the normal Scratch website you can only search for projects and studios. It would be so much better if you could be able to search for users and forum posts as well. Using Google's Programmable Search Engines (not sponsored) its actually easier than it seems. I even made options so you can set the search to only search for forum posts or users. Sooo, you can now use Better Search For Scratch by Yellowdog. I made it as easy as possible to use, all you have to do is go to the page and type what you would like to search! Click the button below to use it.

Siri 2.0: Making a GPT voice assistant

Once, while dabbling with AI again, I thought to myself, "Why can't I talk to AI?". Literally talk to it, not just type on a k...